|
<< Click to Display Table of Contents >> Using the Application |
  
|
|
<< Click to Display Table of Contents >> Using the Application |
|
Login
In version 4 of GaeaSynergy all users must login to the application. When users are setup in the application they are assigned a username, password, and user type (privilege). Different privilege levels are used to control access to functions of the program and data. The different user types are administrator, power user, limited user, and guest. For more information on setting up users see User Administration.
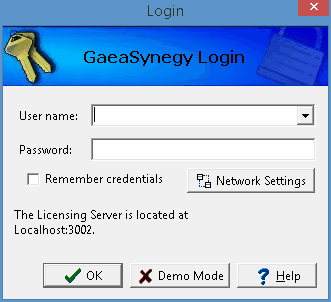
To have the application remember your user name and password, check remember credentials. The next time the application is started you will not need to enter your login credentials. If you are using the network to login, the Network Settings button can be used to change the network properties.
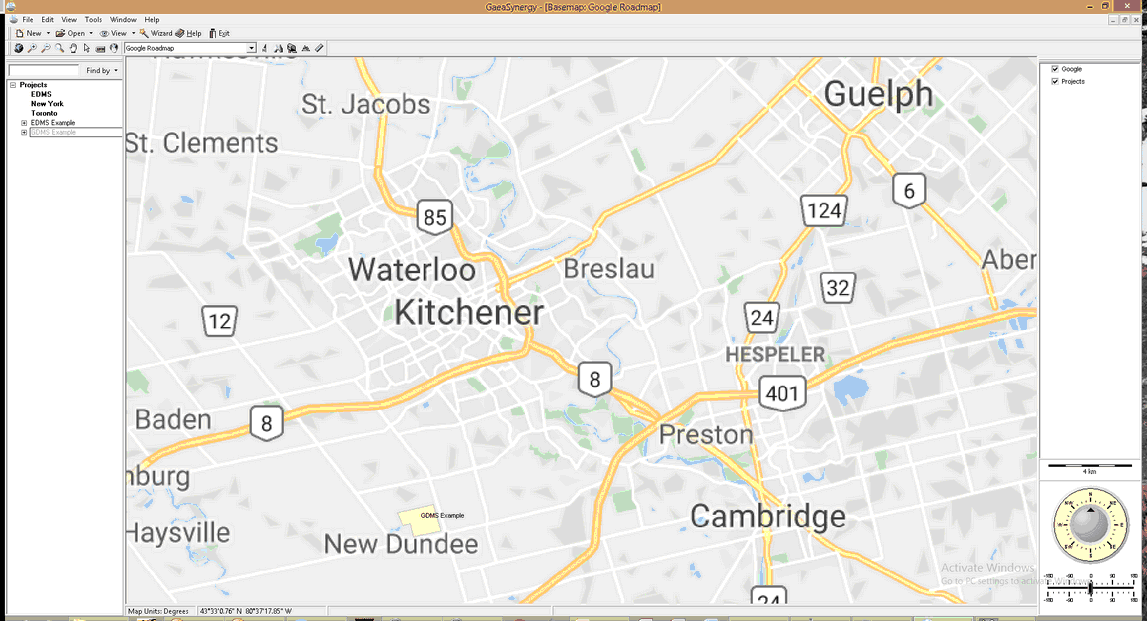
Initial Display
The initial display will consist of a basemap or a list of projects depending on your settings in Preferences. The basemap shows your existing projects and any GIS data contained in the basemap. To the left of the basemap the sidebar usually shows a list of your projects. And to the right of the basemap the sidebar usually shows a list of layers, scale, and an index map. At the top of the display there are also toolbars and menus for controlling and using the program. These are described briefly below and in detail in the chapters throughout this manual.
Menus
The main menu appears at the top of the screen and is composed of several submenus for Files, Tools, and Help. Depending upon what is open at the time, an Edit submenu may also be present. The File submenu is used to create, open, and delete projects, libraries, and templates; import and export data; and set program preferences. Several types of tools are included in the Tools submenu for the geodatabase, projects, adding and editing a variety of list data, and managing the program licenses.
In this User's Guide menu items and paths have been abbreviated to make it easier to understand. All menu items are shown in blue italics and start with the uppermost menu then an arrow to the next menu or menu item. For example, the Project menu item of the Open submenu of the File menu is abbreviated as File > Open > Project.
A popup menu can also be displayed by clicking the right mouse button, the menu items in the popup menu will vary depending on what is being displayed and where on the screen the mouse is clicked. In this manual menu items that can be obtained from the popup menu are shown as Popup > menu item.
Toolbars
Initially two toolbars will be displayed, a Main toolbar and a Basemap toolbar.
![]()
The Main toolbar is used to create, open, and close projects, templates, and libraries. If a project is open you can also create and open boring/well, cross-sections, samples, stations, lab analyses, geotechnical tests, contour maps, structures, and 3D views with the Main toolbar. In addition it can be used to display different views, the help wizard, help guide and exit the program.
![]()
The Basemap toolbar is used to access various features and functionality of the basemap. This toolbar is described briefly in the Basemaps section below and in detail in Chapter 2.
Sidebars
The sidebars can be on the left, right, or both sides and contain the contents described below.
Projects
The projects region has a Find Project toolbar and a list of projects. You can locate a project in the list using the Find toolbar by entering the project name and pressing the Find button. The project will then be highlighted in the project list and be zoomed to in the basemap. You can also zoom to a project in the project list by selecting the Popup > Locate after the project has been highlighted in the list.
To open a project using the Project List, highlight the project and then select Popup > Open or double-click on it in the sidebar. If no project is selected, the Open Project form will be displayed. This form lists the projects and lets you select one to open.
For a detailed description of how to create and use projects see the section below and Chapter 4.
Layers
The layers region lists the layers in the basemap. These layers can be turned on and off by checking and unchecking the box beside the layer. The layers in the basemap can be edited, added and removed by editing the basemap, this is described in detail in Chapter 2. The order of the layers in the sidebar controls the order in which they are displayed in the basemap, with the layers at the top being drawn on the layers at the bottom.
Scale Bar
The scale bar displays the current scale of the basemap or project shown in the GIS window.
North Direction
The compass on the bottom right shows the current direction for North. When the application is started this is at the top of the screen. To change the direction slide the bar to the left or right below the compass. Sliding to the left will rotate the GIS windows to the West, sliding to the right will rotate to the East. Double-click on the slider to adjust the display so that North is at the top of the screen again.