|
<< Click to Display Table of Contents >> Importing Output Data from Excel |
  
|
|
<< Click to Display Table of Contents >> Importing Output Data from Excel |
|
To import the data from an Excel file select File > Import > Output Data from Excel File. You will then be asked to select the file to import.
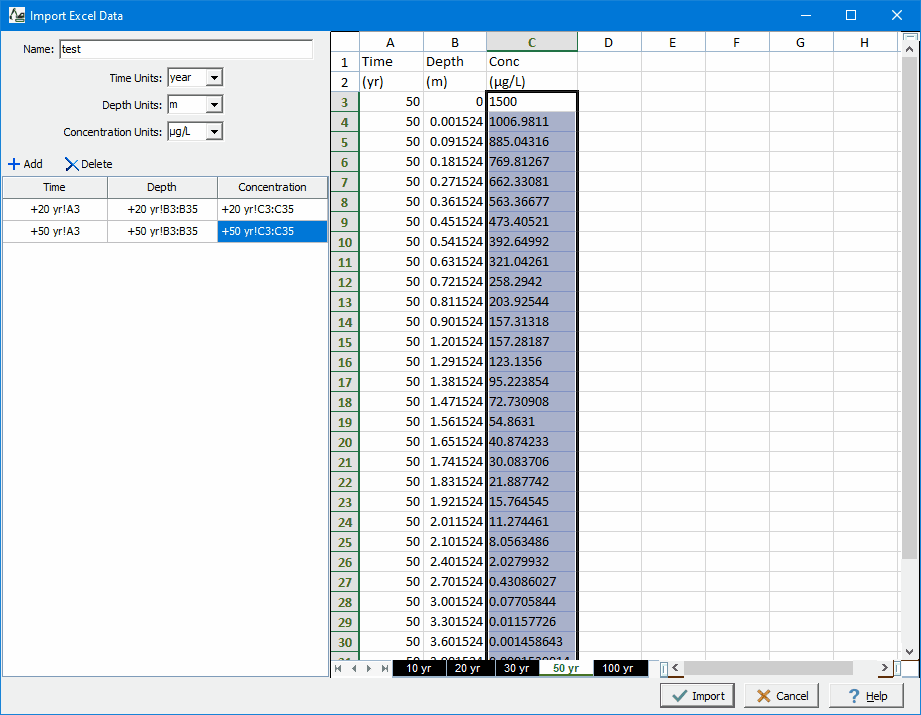
After the file has been selected, the Import Excel Data form will be displayed. On the right of this form is the Excel sheets from the file and on the left of the form the following can be specified:
Name: This is the name to use for the imported data. It will show up in the legend for the charts.
Time Units: This is used to select the time units for the imported data.
Depth Units: This is used to select the depth units for the imported data.
Concentration Units: This is used to select the concentration units for the imported data.
Import Table
The data to be imported from the Excel sheets on the right must be specified in the Import Table. For each time to be imported the range of cells for the depth and concentration must be selected. At the top of the Import Table there are buttons to Add and Delete a time.
The time can be selected by first selecting the time cell in the Import Table and then clicking on the time in sheets on the right side of the form. After a time has been selected the range of cells for the depth and concentration can be specified by first clicking on the cell in the Import Table, then selecting the first cell in the sheets on the right side of the form and while holding down the left mouse button selecting the last cell in the range.
After all of the data to be imported has been specified in the Import Table, press the Import button to import the data.