|
<< Click to Display Table of Contents >> Water Levels |
  
|
|
<< Click to Display Table of Contents >> Water Levels |
|
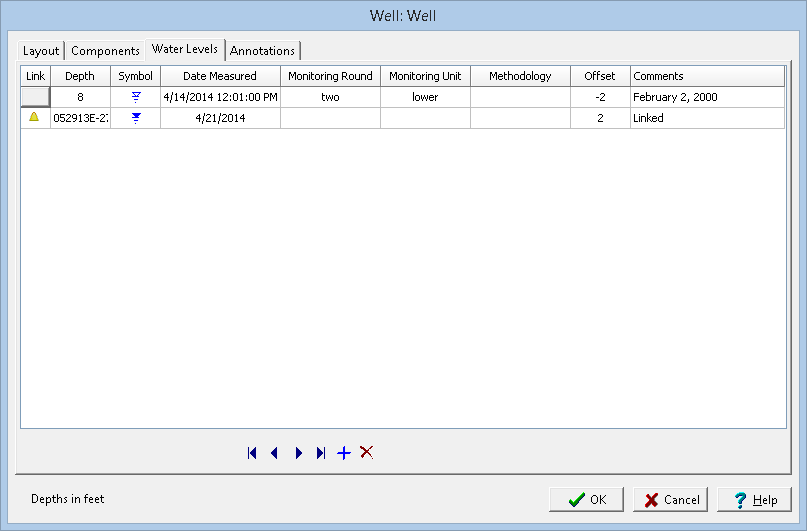
The Water Levels tab below is used to edit the water levels measured in the well.
(The appearance of the form will differ slightly depending on if it is WinLoG or WinLoG RT)
The following information can be edited using this tab:
Link:
Depth: This is the measured depth of the water level in the same units as set in the template.
Symbol: This is the symbol to use to represent the water table. When the cursor is clicked on this column, the Water Level Symbol form is displayed. This form is used to select the symbol, symbol size, color, and line width.
Date Measured: This can be used to select the date that the water level was measured.
Monitoring Round: This is used to specify the monitoring round for the water level.
Monitoring Unit: This is used to specify the monitoring unit for the water level.
Methodology: This is used to specify the methodology used to measure the water level.
Offset: This is the offset to place the water level symbol from the center of the hole. Offsets to the left are negative and offsets to the right are positive.
Comments: This is the text to display above the water level symbol. The text will be oriented vertically above the symbol.
The buttons at the bottom of this tab are used for the following:
•The Start button moves to the first water level.
•The Previous button moves to the previous water level.
•The Next button moves to the next water level.
•The End button moves to the last water level.
•The Insert button creates a new water level.
•The Delete button deletes this water level.