|
<< Click to Display Table of Contents >> Sample Data |
  
|
|
<< Click to Display Table of Contents >> Sample Data |
|
Soil, rock, ice, and other samples are generally taken with split-spoon samplers, Shelby tubes, Core Barrels, etc. at various depths of the borehole. These samples are later used for detailed identification, lab analysis, and other purposes.
There are several ways to edit the sample data, either:
•click on any of the sample data columns (Number, Type, Recovery, etc.) on the log
•double click on one of the Sample Data objects (Number, Type, Recovery, etc.) on the sidebar
•select Edit > Sample Data
•or select Popup > Sample Data
After this the Sample Data form below will be displayed. This form is used to edit the data for each sample, that is displayed in one or more columns of the log. The template determines the type of information displayed on the log for the sample. The data columns to be displayed can be changed by right clicking on the first header row. A popup menu will be displayed showing all of the columns that can be displayed. Check the box next to the columns to display in the list.
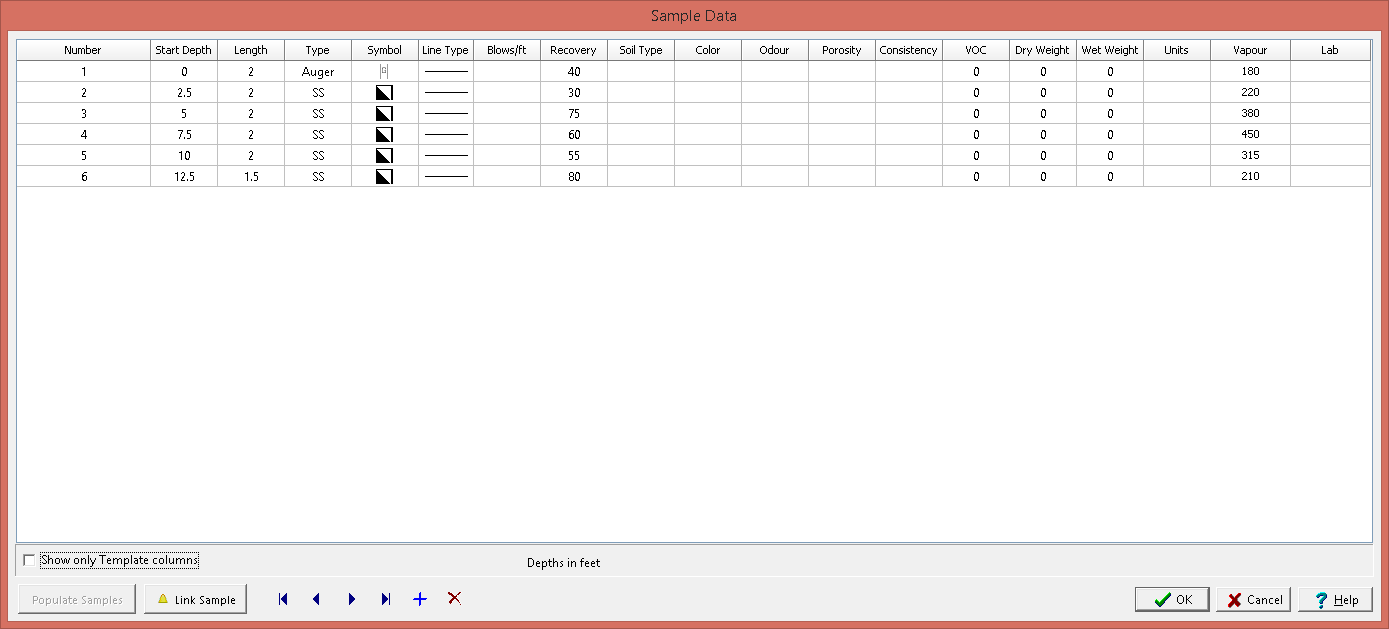
(The appearance of the form will differ slightly depending on if it is WinLoG or WinLoG RT)
The following information can be edited on this form:
Link: To link a sample to an EDMS soil sample click on the Link column for that sample, then click on the button that appears. A list of EDMS soil samples that are associated with the boring/well will be displayed, select the soil sample to link. The data from the EDMS soil sample will automatically be shown on the Sample Data form and appropriate log columns. In the Link column for this sample a triangle symbol will be shown to indicate that the sample is linked to an EDMS sample. Except for the sample type, N Value, symbol, line type, and any sample other types the data for this linked sample cannot be edited in the boring/well log. For more information see the Soil Sample Integration section in Chapter 8.
Number: This is the sample number.
Start Depth: This is the start depth of the sample. The depth should be specified in the same units as set in the template. The start depth is the only field that must be specified for the sample all of the other information is optional.
Length: This is the length of the sample. The length should be specified in the same units as set in the template. Initially when a sample is created the default length set in the template is displayed.
Type: This is the type of sample.
Symbol: This is the symbol used to represent the sample. When this column is selected, a button will be displayed for the sample symbol. After this button is pressed, the Sample Symbol form is displayed. This form can be used to select the sample symbol, foreground color, and background color.
Line Type: This is the style of line that is used to draw the top and bottom boundaries of the sample. When this column is selected, a button will be displayed for the line type. After this button is pressed, the Line Properties form is displayed. This form is used to set the line style, thickness, and color. The line style can be set to none to display no line at the boundaries.
Blows/ft: This is the blow count or N-Value of the sample. When entering N-Value data a line break can be added to the data by specifying a “/” between data values (e.g. 12/18/16/22). In addition, the 4 N-Values normally specified, can be spaced equally across the column by specifying a “^” at the beginning of the data. This column is only available with some industry versions of the module (Geotechnical, Environmental and Mining).
Recovery: This is the sample recovery, usually expressed as a percentage or as a length measurement. Depending upon the template settings the recovery can be represented on the log as text or as a shaded box that covers the specified portion of the sample interval. For example, if the recovery were 75% then a box covering 75% of the sample interval would be drawn.
Soil Type: This can be used to select a soil type from a predefined list of soil types. This list can be edited by going to Tools > EDMS > Samples > Soil Types.
Color: This can be used to select a soil color from a predefined list of soil colors. This list can be edited by going to Tools > EDMS > Samples > Colors.
Odour: This can be used to select a odour from a predefined list of odours. This list can be edited by going to Tools > EDMS > Samples > Odours.
Porosity: This can be used to select a porosity type from a predefined list of porosity types. This list can be edited by going to Tools > EDMS > Samples > Soil Porosities.
Consistency: This can be used to select a soil consistency from a predefined list of soil consistencies. This list can be edited by going to Tools > EDMS > Samples > Soil Consistencies.
VOC: This can be used to specify the VOC for the sample.
Dry Weight: This can be used to specify the dry weight for the sample.
Wet Weight: This can be used to specify the wet weight for the sample.
Units: This can be used to select the units for the dry and wet weight.
Other: In addition to the above data, other types of data can be entered for each sample. The number of other data types and the names for this data is specified in the template. Other data is stored and displayed as text strings. The name of the other data is specified as the column name. This string is displayed at the top of each other data column when the log is edited.
Show Only Template Columns: Check this to show only the columns that are displayed using the current template.
Auto Population
If no samples have been specified yet, the program can automatically create samples using some sampling information by clicking on the Populate Samples button.
The buttons on the form are used for the following:
•The Start button moves to the first sample.
•The Previous button moves to the previous sample.
•The Next button moves to the next sample.
•The End button moves to the last sample.
•The Insert button creates a new sample.
•The Delete button deletes the sample.