|
<< Click to Display Table of Contents >> GIS Toolbar |
  
|
|
<< Click to Display Table of Contents >> GIS Toolbar |
|
![]()
The GIS toolbar can be used to adjust the basemap display; find, identify and select features.The controls on this toolbar depend on whether the basemap is a static basemap or web map service.
Full Extent
![]()
The Full Extent button will display the full extent of the GIS or project
Zoom In
![]()
The Zoom In button is used to zoom in to a smaller scale on the GIS.
Zoom-out
![]()
The Zoom Out button is used to zoom out to a larger scale on the GIS.
Dynamic Zoom
![]()
The Dynamic Zoom button can be used to zoom in and out using the mouse.
To zoom in
1. |
Click on the View/Zoom mode menu item. |
2. |
Within the Map area choose a rectangular area to which you would like to zoom in. |
3. |
Move the mouse pointer to the top left corner of the area and press the left mouse button. |
4.
|
Move the mouse pointer to the bottom right corner of the area and release the left mouse button.
|
To zoom out
1. |
Click on the View/Zoom mode menu item. |
2. |
Within the Map area decide how large should be the area containing the currently visible extent and where it should be located after zooming out. |
3. |
Move the mouse pointer to the bottom right corner of this area and press the left mouse button. |
4. |
Move the mouse pointer to the top left corner of this area and release the left mouse button. |
Drag
![]()
The Drag button is used to move the visible area on the screen. To move the visible area click on the screen and while holding the mouse button down move the cursor in the desired direction to see that area displayed.
Select Feature
![]()
The Select Feature button can be used to select a feature on the map. To select a feature click on the button and then click on the feature on the map. The attributes of the selected feature will then be displayed as shown below.

Display Hints
![]()
The Display Hints button can be used to select the layer and field used for hints. These hints can optionally be displayed when the mouse is over a feature on the map. For example, when the mouse if over a project the hint could display the project name. When the button is pressed the Map Hint Properties form below will be displayed. This form can be used to specify whether hints are shown, the hint color, layer and field to use for the hint.

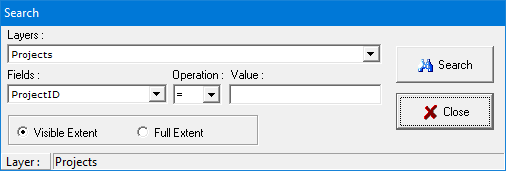
Search
![]()
The Search button can be used to search for features on the map that meet a specified criteria. When this button is pressed the Search form below will be displayed. This form can be used to specify the layer, field. and search criteria. When the Search button on this form is pressed any features that meet this criteria will be momentarily highlighted.
Web Map Service
![]()
This drop down list can be used to select the current web map service being displayed.
North Arrow
![]()
The North arrow on the GIS can be turned on and off using the North Arrow button. The color of this arrow is specified in Preferences.
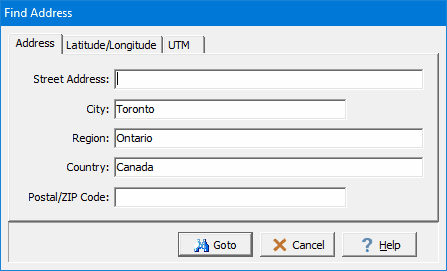
Find Address
![]()
Addresses can be located on the GIS by clicking on the Find Address button. The form below will be displayed and can be used to find addresses by street address, latitude and longitude, or UTM coordinated.
Find Address at a Point
![]()
The address of a point on the GIS can be displayed using the find address at a point button. After this button is clicked, click on the point on the GIS and the address will be displayed.
Find Elevation at a Point
![]()
The elevation of a point on the GIS can be displayed using the find elevation at a point button. After this button is clicked, click on the point on the GIS and the elevation will be displayed.
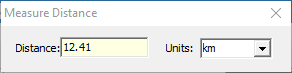
Measure Distance
![]()
Distances can be measured on the GIS using the Measure Distance tool on the GIS toolbar. When this tool is selected the Ruler control below will be displayed. The distance units can be set using the drop down list on the right. To measure a distance click on the first point and then click on the second. To hide the Ruler control click on the Measure Distance tool again.
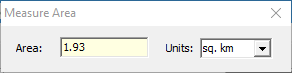
Measure Area
![]()
Areas can be measured on the GIS using the Measure Area tool on the GIS toolbar. When this tool is selected the Ruler control below will be displayed. The area units can be set using the drop down list on the right. To measure an area click on the first point and then click on the next points. To hide the Ruler control click on the Measure Area tool again.
Street View
![]()
A street view for a point on the GIS can be obtained by clicking on the down arrow of the Street View button and selected either Google or Bing. Then click on the point on the map to display the street view in the Street View form. Additional street views can be displayed by closing the form and clicking on other points on the map.
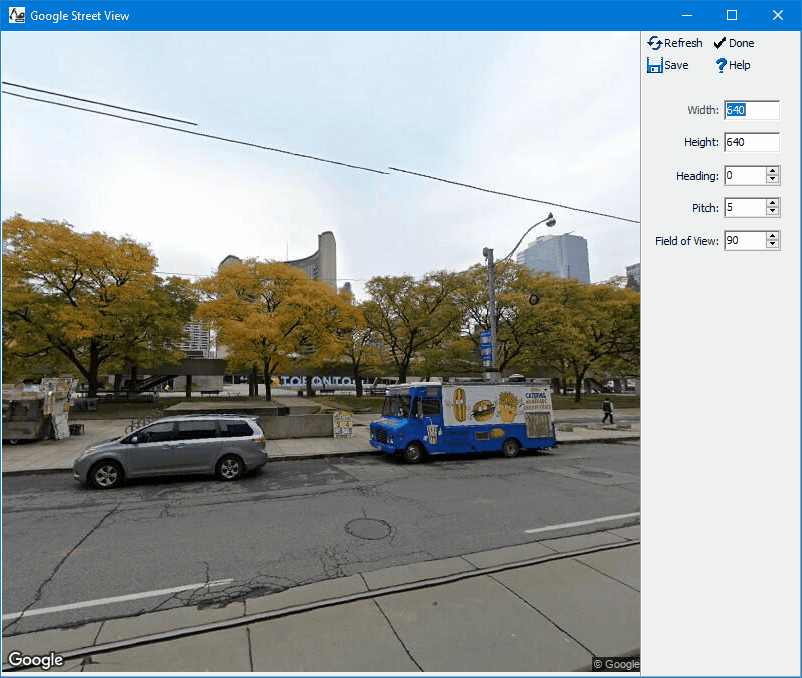
The following can be specified on this form:
Width: This is the width of the image in pixels.
Height: This is the height of the image in pixels.
Heading: This is the heading from North of the image.
Pitch: This is the vertical pitch on the image. Positive values are up and negative values are down.
Field of View: This is the field of view of the image
After the parameters above have been changed use the Refresh button to update the image. To save the image to a JPEG file click on the Save button and specify the file name.
Overlay Grid
![]()
If a local project is open, the overlay grid button on the toolbar can be used to overlay a grid on the project. When this button is pressed the Project Grid form is displayed.
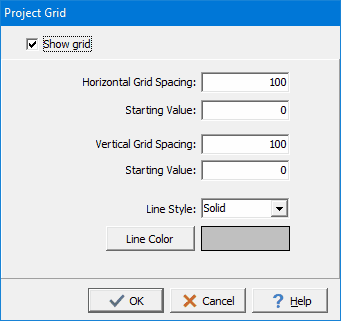
The following can be specified on this form:
Show Grid: Check this box to overlay a grid.
Horizontal Grid Spacing: This is the horizontal spacing between grid lines in local units.
Starting Value: This is the horizontal start value for the grid.
Vertical Grid Spacing: This is the vertical spacing between grid lines in local units.
Starting Value: This is the vertical start value for the grid.
Line Style: This is used to select the line style for the grid lines.
Line Color: Press this button to select the color for the grid lines.