|
<< Click to Display Table of Contents >> Importing Excel Log Data |
  
|
|
<< Click to Display Table of Contents >> Importing Excel Log Data |
  
|
Data from Excel spreadsheets can be imported into an existing boring or well log or be used to create new borings or wells. This data can be collected in Excel on laptops, tablets, and I-Pads that support the Excel "xlsx" format.
Several types of data for a log can be imported from an Excel spreadsheet. The types of data that can be imported will depend on the template for the log. Most of the data in the template can be imported.
•To create new borings or wells using imported Excel data, select File > Import > Excel Boring/Well Data when a project is open but no boring or well is open,
•To import the data into an existing boring or well, select File > Import > Excel Boring/Well Data when a boring or well is open.
The Import Excel Data form will be displayed. This form is used to specify the Excel file to be imported and the cell correspondence between the Excel spreadsheet and the data in the boring/well log.
If new borings or wells are being created the Template field and select Template button will be displayed on this form. If the data is being imported into an existing boring or well the template is used from the existing boring or well.
In addition, the start and end page in the Excel spreadsheet should be specified. This can be used to import more than one boring or well at a time. When creating more than one boring or well each Excel page will be used to create one boring or well and all of the Excel pages should be formatted the same. If only one well or boring is being imported then the data to import can be spread across several Excel pages.
The template and cell correspondence specified on this form can be saved to a script file using the Save Script button. This script file then can be opened using the Open Script button and used to import boring/well data from other Excel files that have the same formatting.
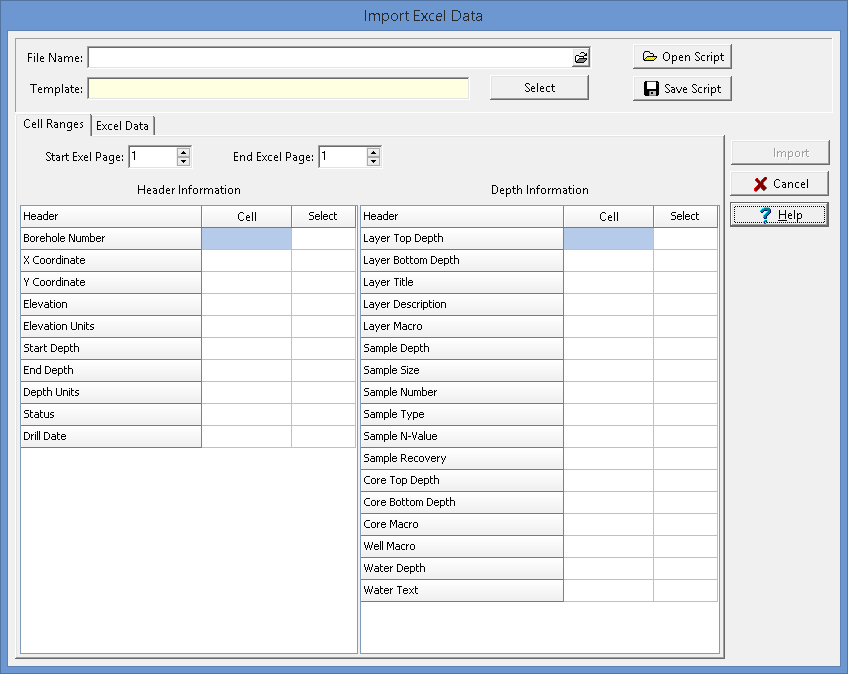
(The appearance of the form will differ slightly depending on if it is WinLoG or WinLoG RT)
The Excel spreadsheet to be imported should be specified first in the File Name on the form. It can be selected using the button to the right. If the data is being imported into an existing boring/well log, after the Excel file has been specified the form will be updated with the available data that can be imported using the template of the existing boring/well log.
If a script is being used to specify the cell range data, it should be selected next by clicking on the Open Script button.
When creating new borings or wells the template also needs to be specified. This can be done by clicking on the Select button to the right of the template name or by opening an import script. After the template has been specified the form will be updated with the available data that can be imported. In addition, when new borings or wells are being created a cell range for the Borehole Number must also be specified.
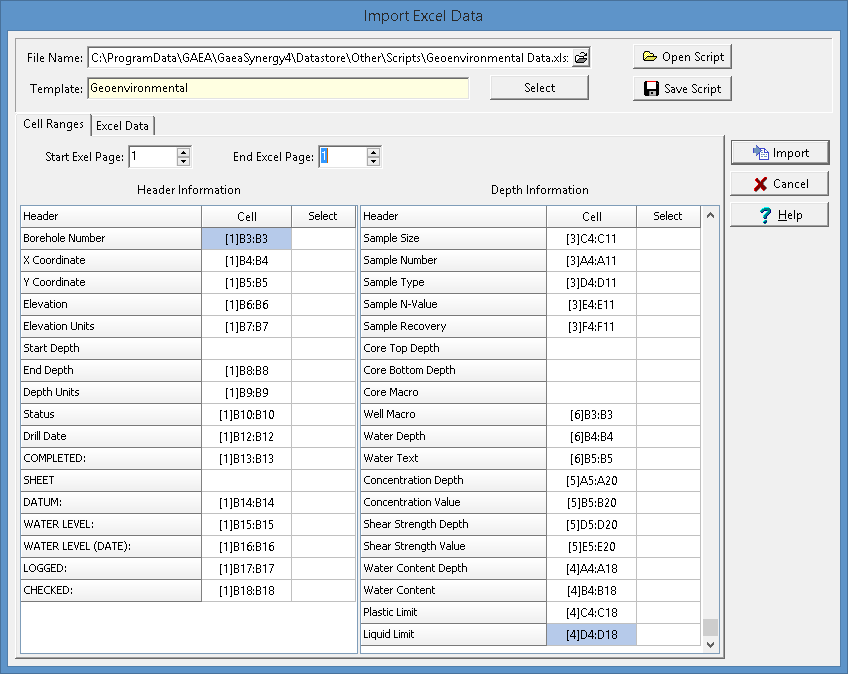
(The appearance of the form will differ slightly depending on if it is WinLoG or WinLoG RT)
The Cell Ranges tab is used to specify the correspondence between cells in the Excel spreadsheet and the data in the boring/well log. On the left side of this tab the data for the header (and footer) is specified and on the right side the data for the depth related columns is specified. One or more of these data types can be imported by specifying the cell range in the Cells column. If no cell range is specified for the data type, that data will not be imported.
The cell range can be specified by typing it in or by clicking on the Select column to the right of the cell range. A Select button will be displayed in the column, click on this button to display the spreadsheet in the Excel Data tab.
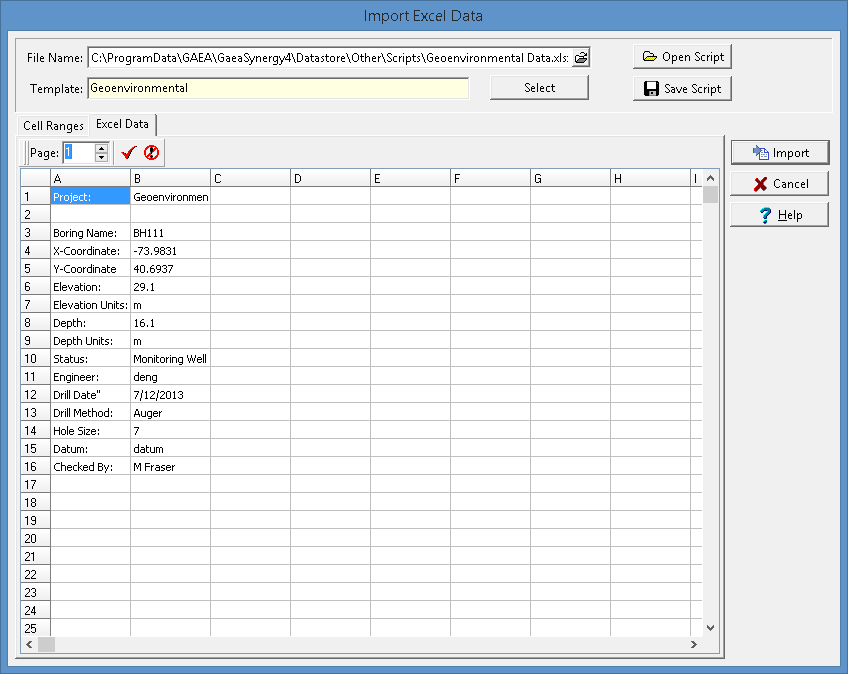
(The appearance of the form will differ slightly depending on if it is WinLoG or WinLoG RT)
To select the cell range, click on the first cell and then hold the left mouse button down while selecting the cells. When the cell range has been selected, click the right mouse button or the Ok button on the toolbar above to return to the Cell Ranges tab. The selected cell range will be filled in on the form. This operation can be repeated until all of the cell ranges for the data types have been specified. The cell ranges for the header data should only contain one cell and the cell ranges for the depth data should contain either a row or column of cells.
The data in the Excel spreadsheet can be on multiple sheets. To select a cell range from a different sheet use the up and down buttons beside the Page on the toolbar.
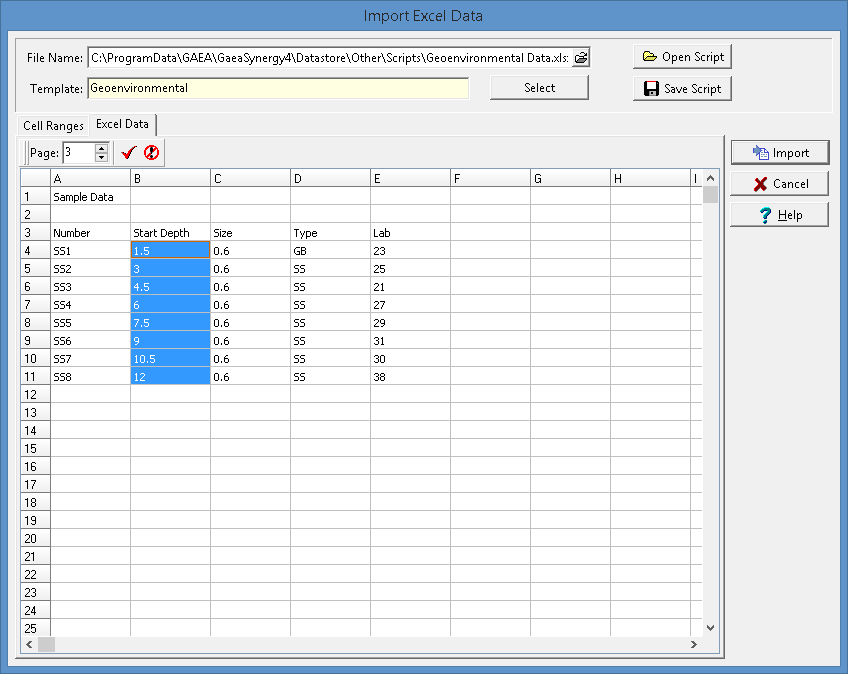
(The appearance of the form will differ slightly depending on if it is WinLoG or WinLoG RT)
When all of the cell ranges that are to be imported are entered, click on the Save Script button to save the cell ranges so they can be used for the next Excel spreadsheet. To import the data, click on the Import button. If the data is being imported into an existing boring or well log the data will be shown in the log after it has been imported. If new borings or wells are being created the data will be imported and the new borings or wells will be added to the project.
Macros
Lithologic and well macros can also be used to specify data for the boring/well log.
By specifying a cell range for the lithologic macros, the lithologic name, description, and symbol for the layer can be assigned similar to the way they are when specifying the lithology for the boring log.
A cell can be specified that contains a well macro to use for the boring/well data. The well macro is used to specify the well components, water levels, and text annotation for the well.
Well Symbols
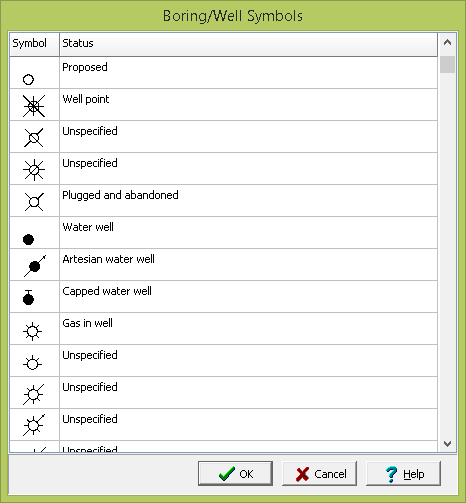
The symbol used on the project map for the boring or well can be specified using the Well Status in the header.
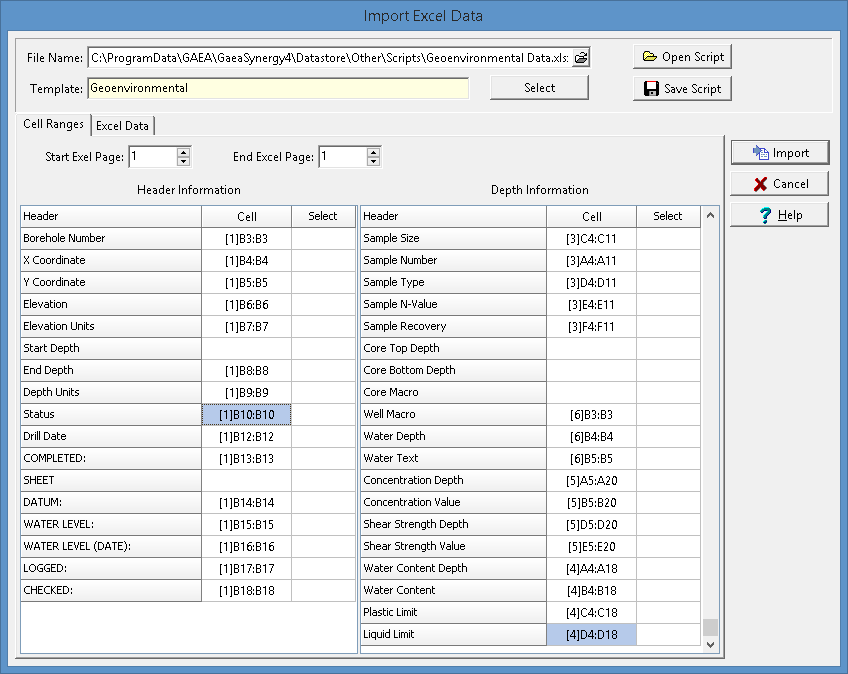
The symbol used will correspond to the well status as shown in the Boring/Well Symbols form below. The status for each symbol can be edited by selecting Tools > Boreholes > Boring/Well Symbols.
